


Natural Stone Walling: Loose Stone vs. Pre-Assembled Veneer Panels
Glenn Russell - Master Stonemason
Experienced working in the industry for over 40 years.
Author
Expert insights by Master Stonemason, Glenn Russell.
Choosing the right natural stone walling for your Melbourne project involves balancing aesthetic authenticity with installation efficiency. This comprehensive guide evaluates the two primary formats: Loose Stone (Freeform) and Pre-Assembled Stone Panels (Z-Tiles).
Whether you are seeking the rugged, hand-crafted finish of traditional dry-stack walling or the cost-effective, DIY-friendly application of modular interlocking panels, we break down the critical differences in material cost, labor requirements, and long-term durability. Learn how to select the ideal stone cladding to enhance your home’s value and architectural appeal.
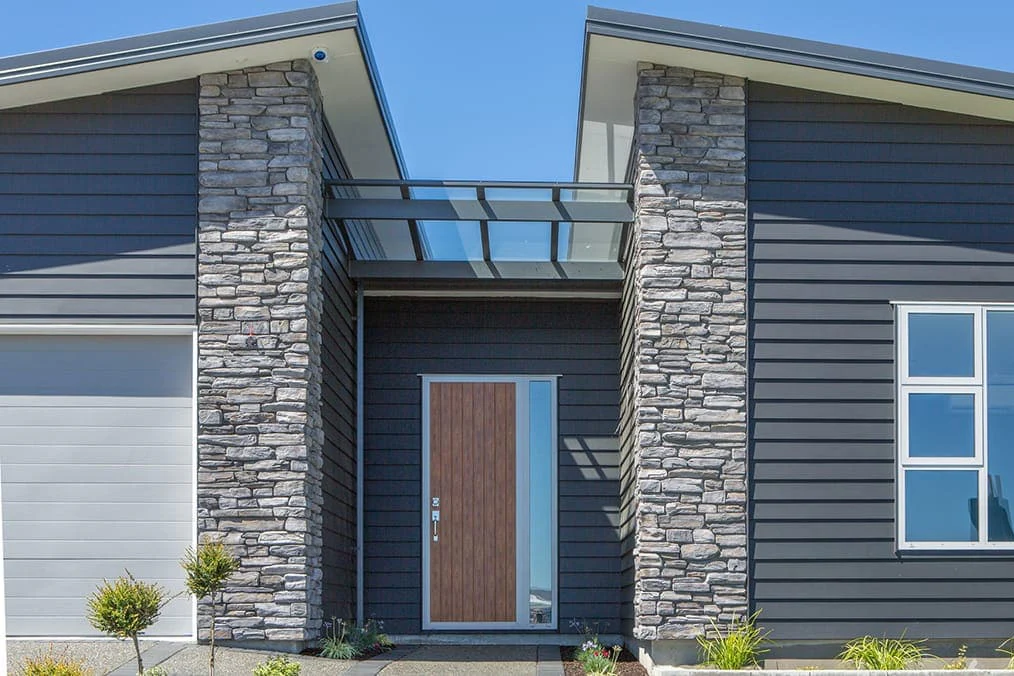
1. Pre-Assembled Panels (Z-Tiles)
The “Easy-Install” Solution
Stacked stone panels (often called Z-tiles because of their interlocking shape) consist of small pieces of natural stone glued together onto a mesh or cement backing. They arrive as ready-to-install rectangular modules.
The Look: Very structured and “linear.” It creates a modern, sleek stacked-stone effect that is popular for water features and pillars.
Installation: Extremely fast. Because the pieces are already “puzzled” together, a tiler can cover large areas quickly. It is often a DIY-friendly option.
Cost: Generally more affordable in terms of both the product price and the labour cost to install.
Best For: DIY projects, fireplace surrounds, and feature walls where you want a clean, repeatable pattern.
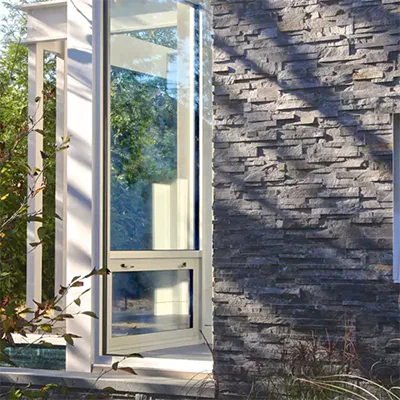
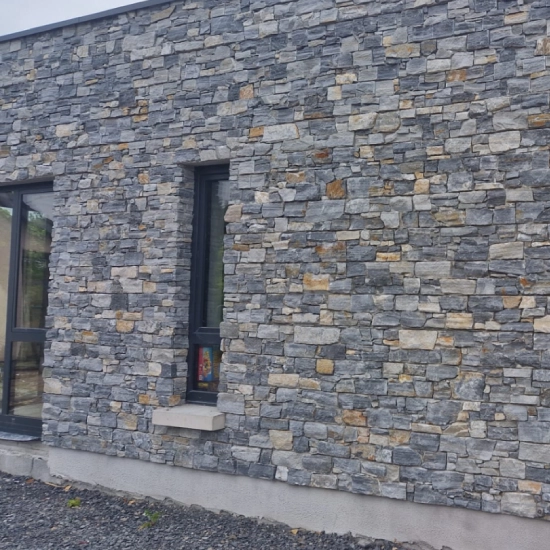
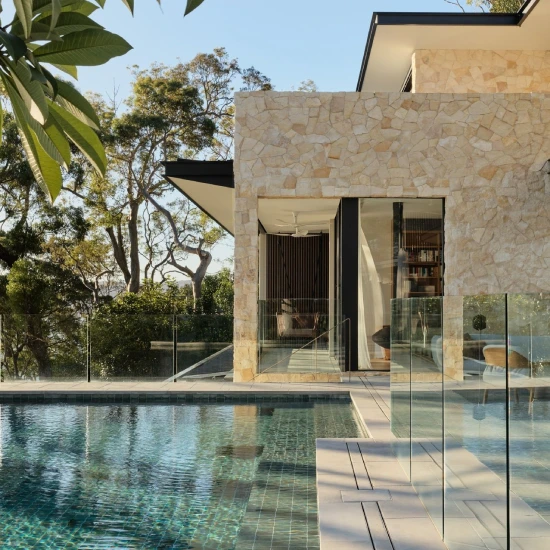
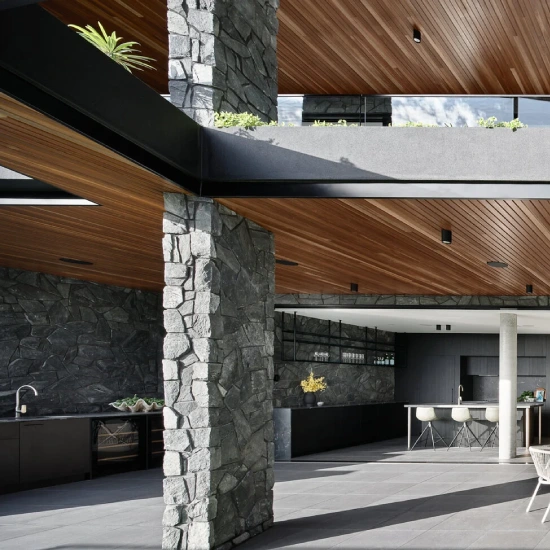
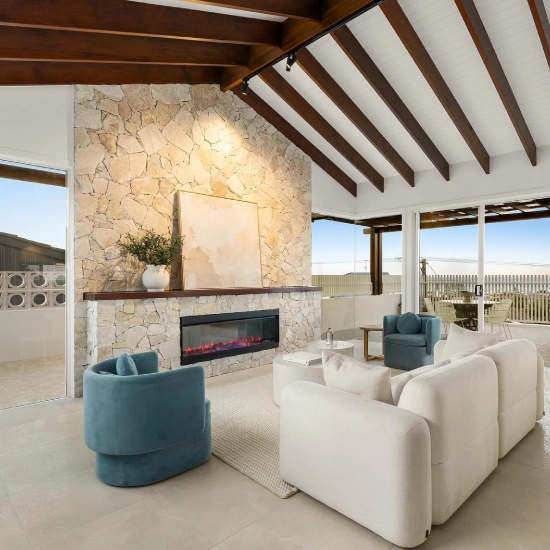
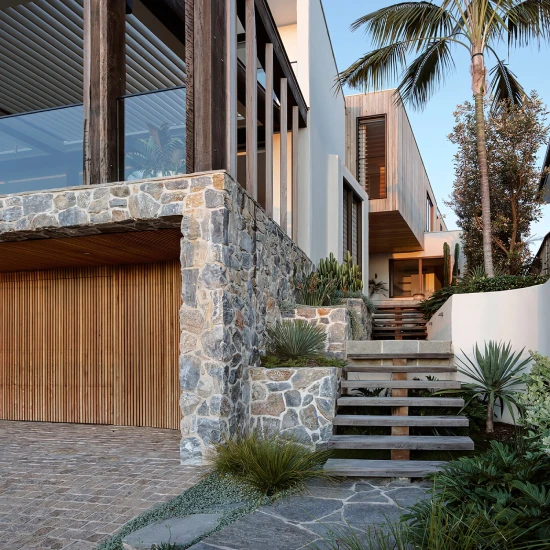
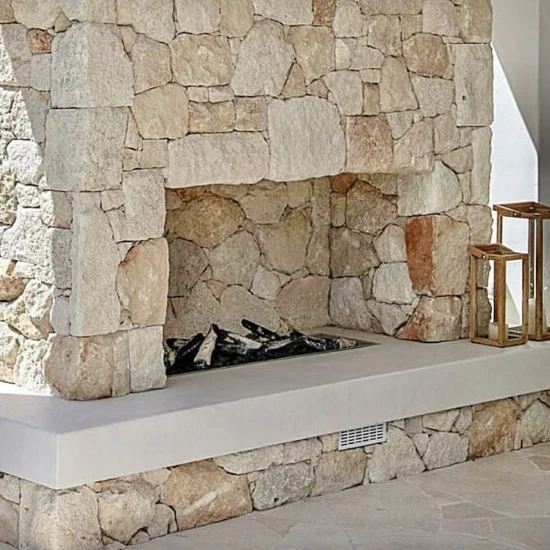
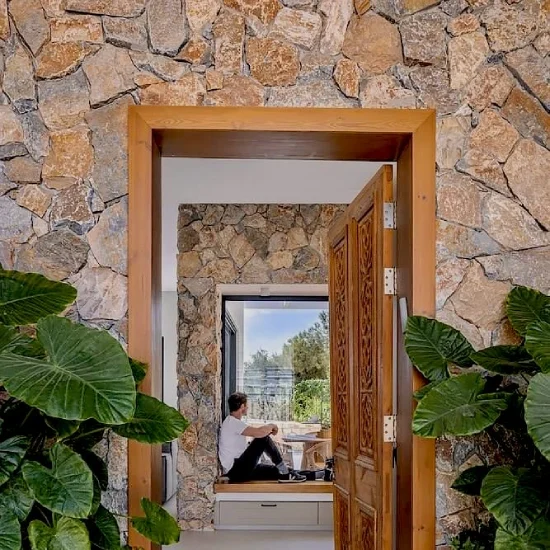
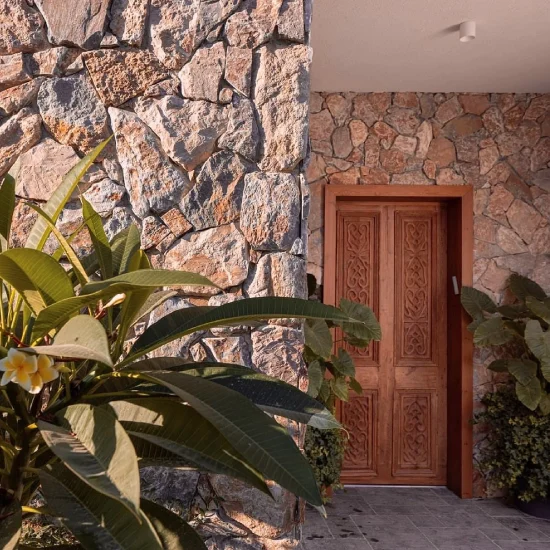
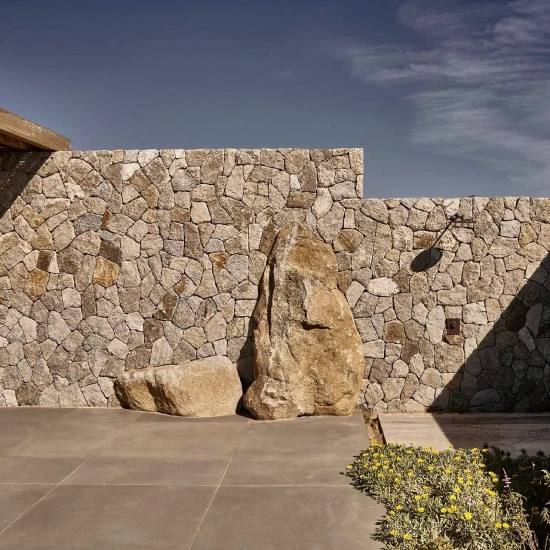
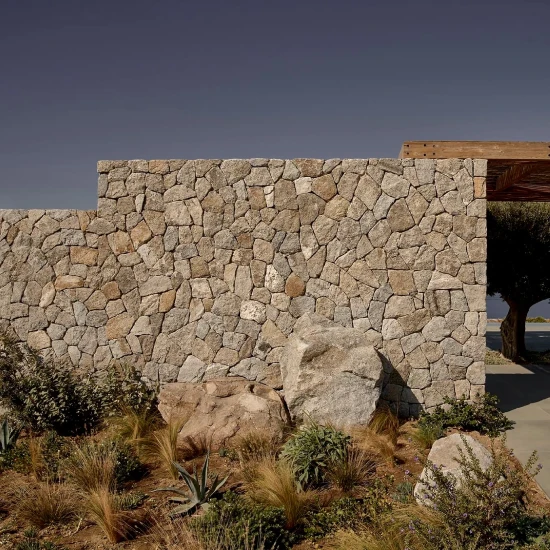
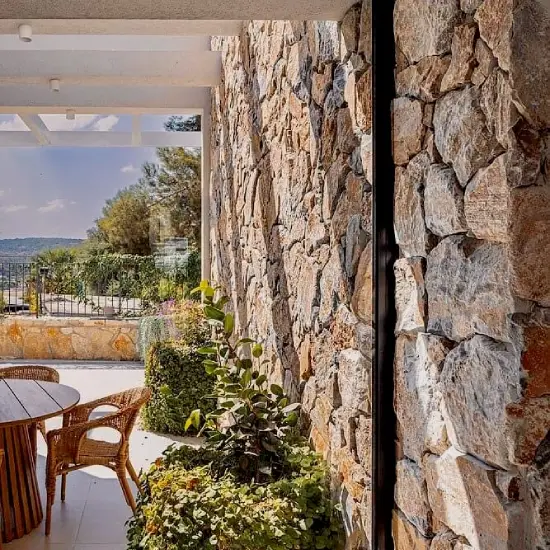
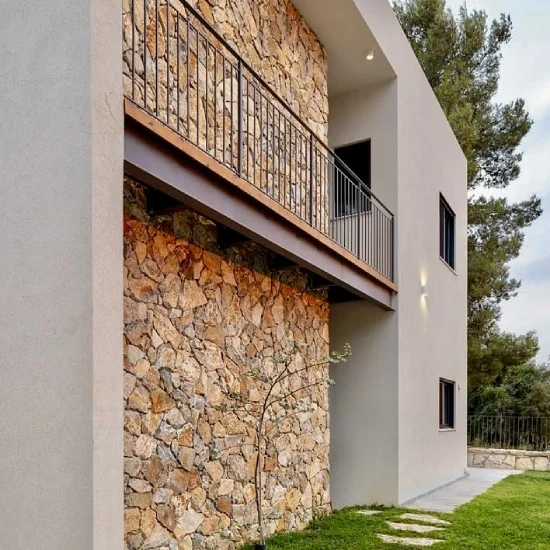
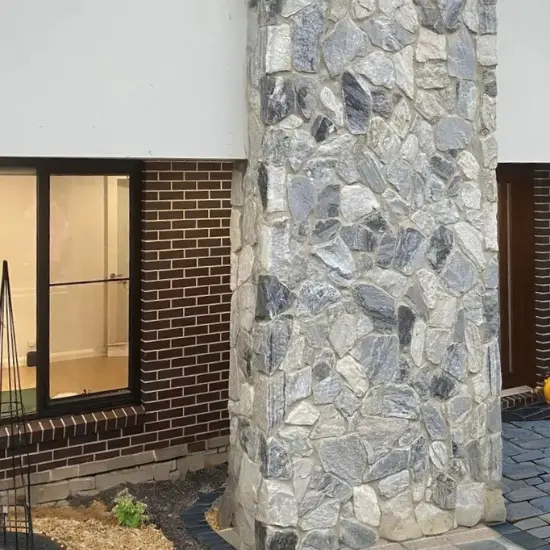
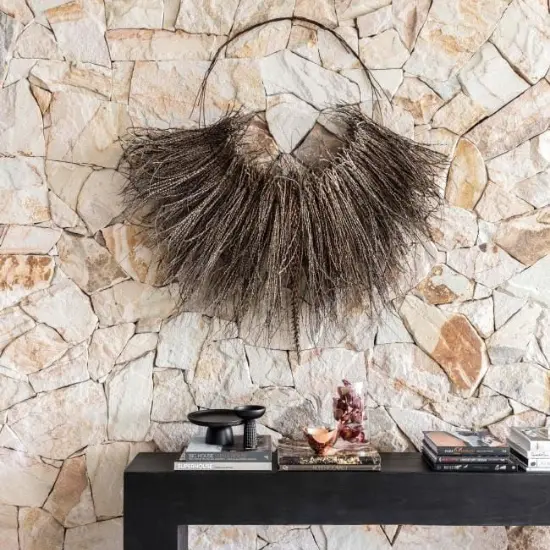
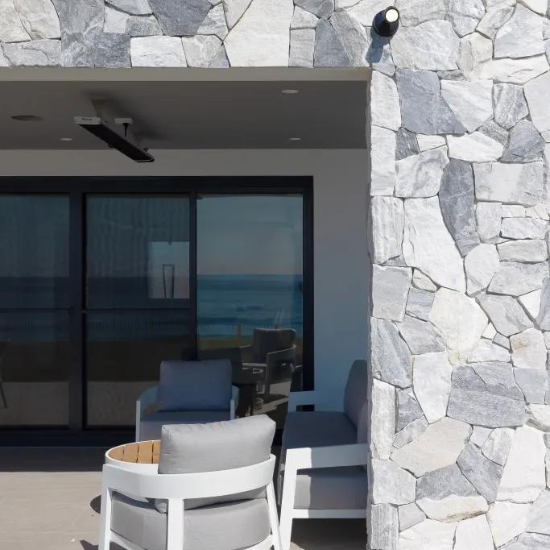
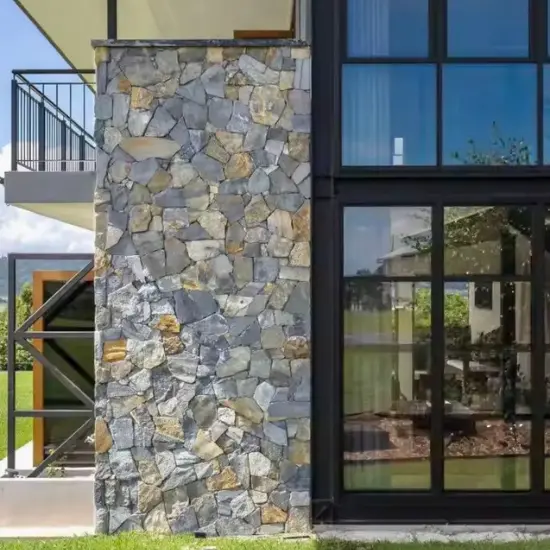
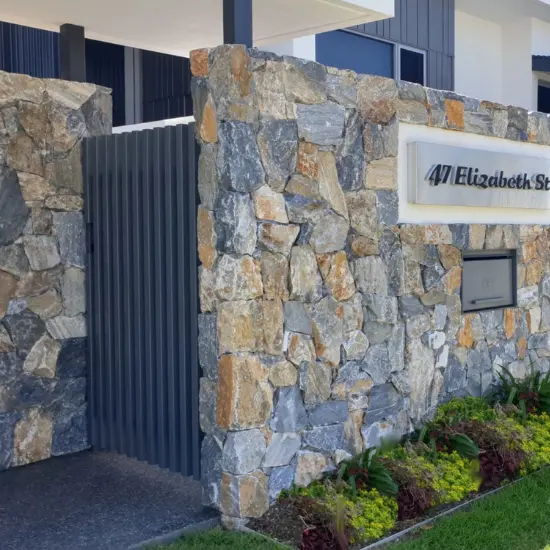
2. Loose Stone Walling (Freeform)
The “Master Mason” Look
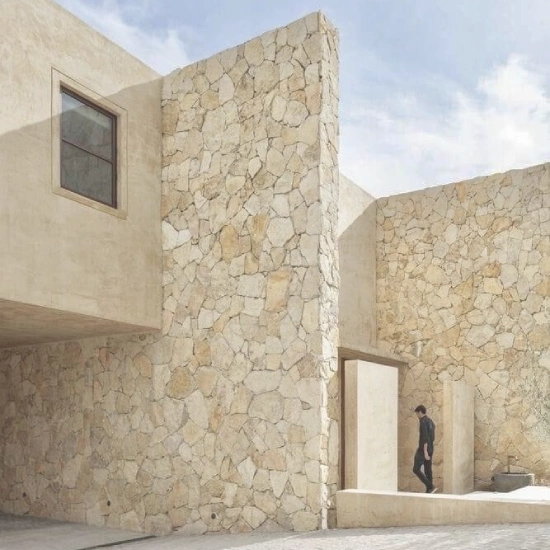
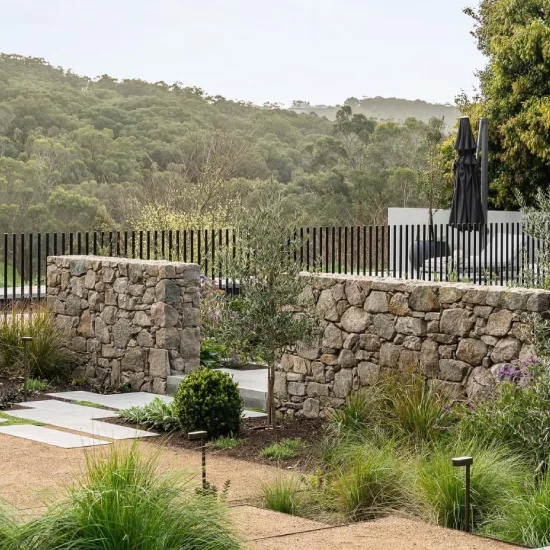
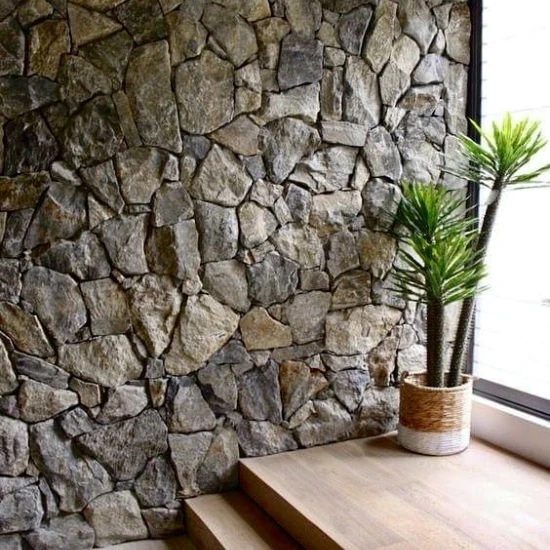
Loose stone cladding consists of individual pieces of stone, split to varying thicknesses. Each piece is unique and is laid one by one, just like a traditional dry-stack stone wall built centuries ago.
The Look: Unmatched authenticity. Because there are no repeating patterns, the wall looks like it was built from solid rock. It provides deep shadows and a rugged, high-end “architectural” finish.
Installation: Labour-intensive. It requires a skilled stonemason to hand-select and “chip” pieces to fit perfectly. It is a slower process, but the results are breathtaking.
Cost: Higher. You are paying for a premium product and the artisan skill required to install it.
Best For: Luxury home facades, grand entrance walls, and landscaping where you want a “forever” look.
At a Glance: Comparison Table
| Feature | Stone Panels (Z-Tiles) | Loose Stone (Freeform) |
| Material | 100% Natural Stone | 100% Natural Stone |
| Install Speed | Very Fast | Slow (Artisan) |
| Required Skill | DIY / General Tiler | Professional Stonemason |
| Corner Finish | Visible Joins (unless using L-corners) | Seamless / Natural |
| Shadow Depth | Minimal to Moderate | High (Deep texture) |
| Price Point | Budget Friendly | Premium |
The “Secret” to a Professional Finish: Corner Pieces
Whether you choose Panels or Loose Stone, the secret to a high-end look is in the corners.
For Panels: Always ask us for L-Shaped Corner Units. These 2 piece wrap around the corner of your wall, hiding the join and making the pillar or wall look like it’s made of solid stone blocks rather than thin tiles.
For Loose Stone: Your mason will “overlap” the stones on the corners to create a structural, authentic appearance.
Or better still Always ask us for L-Shaped Corner Units. These 1 piece L shaped wrap around the corner of your wall, hiding the join and making the pillar or wall look like it’s made of solid stone blocks
Why Choose Our Cladding?
We hold one of Melbourne’s largest ranges of both Loose Stone and Stacked Panels. From the cool greys of our Silver Travertine to the warm, sun-baked hues of our Goldburn Sandstone, we have the stock ready for your next project.
Ready to see the difference? Visit our Melbourne showroom to see our display walls in person, or Order a FREE Sample today.
Part 1: The “Pro-Install” Cheat Sheet
Add this to your product pages as a downloadable PDF or a “Tips” section.
5 Tips for a Flawless Stone Cladding Installation
1. Prep the Surface (The “Scratch” Test) Natural stone is heavy. Ensure your substrate (usually brick, block, or specialized cement sheeting) is clean and structurally sound. If the surface is smooth or painted, you must “scarify” (scratch) it or use a specialized primer to ensure the adhesive grabs properly.
2. Use the Right “Glue” Don’t use standard tile adhesive. For stone cladding, we recommend a High-Strength, Polymer-Modified White Glue (like Mapei Kerabond/Isolastic or Laticrete). White adhesive prevents “shadowing” or staining that can occur with grey glues on lighter stones like Goldburn Sandstone.
3. Lay from the Bottom Up Always start your installation at the bottom and work your way up. If you are doing a corner, always install your L-shaped corner pieces first, then work your flat pieces out from the corner. This ensures the most visible part of the wall looks perfect.
4. The “Dry Lay” Rule Before applying glue, lay out at least 2 square metres of stone on the ground. This allows you to mix pieces from different crates to ensure a natural blend of colours and prevents “blotches” of the same shade appearing on your wall.
5. Seal it Early We recommend applying a high-quality penetrative sealer shortly after installation (once the grout/glue is dry). This protects your investment from moss, algae, and staining—especially important for outdoor feature walls and pool areas.
Part 2: The “How Much Do I Need?” Calculator Guide
Use this text to explain how customers should measure their project.
How to Calculate Your Stone Requirements
Calculating stone cladding is slightly different from floor tiles because you have to account for corners. Follow this simple 3-step formula:
Step 1: Calculate the Flat Area (m²)
Measure the width and height of each wall you plan to cover.
Width (m) x Height (m) = Total Square Metres Subtract any large windows or doors from this total.
Step 2: Calculate the Corners (lm)
Corners are sold by the Lineal Metre (lm), which is the measurement of the corner from top to bottom.
Measure the total height of all external corners. Note: 1 Lineal Metre of corner pieces typically covers about 0.2m² to 0.3m² of your flat area.
Step 3: The “Wastage” Buffer
Natural stone involves cutting and shaping.
For Panels: Add 10% for wastage.
For Loose Stone: Add 15% for wastage (to allow for chipping and shaping).
Pro Tip: “It is much cheaper to order an extra box now than to pay for a separate courier delivery later if you run short by three stones!”
